Project Overview
Jirav is financial data prediction tool that was initially geared toward small to smaller medium sized businesses. In order to grow the company they wanted to target larger businesses as well. The software wasn’t very collaborative, it was difficult to have multiple users working on the same plan.
The head of product decided Jirav needed a collaboration tool. A way for users to assign specific tasks to their team members to enter data into plans to help complete a model. The tool was set up so a user could give specific users different levels of access. This would range from the entire plan down to specific departments or sub categories. The range included view only, comment only, or full edit rights.
When a user would assign tasks they would be able to track progress of the different tasks. There was also a task specific messaging system that would allow the assignee to communicate with whoever assigned them a task. Lastly, when a user completed a task they could mark it as complete and the assignor would then be notified.
Process
The process was broken down to three phases: research, user flows and design.
Research
A significant part of the research phase was getting to learn the product. I was still fairly new at Jirav and I had to learn how to better understand how the application functioned. The other part of research were my customer discussions. I regularly spoke to customers where I would share work in progress to get their feedback. Based on user feedback I was able to put together the user flows and iterate on the concept until I got what the users needed.
User Flows
Most of the user flows were sketched out using pencil and paper. Once I found my baseline flow I put together a series of wireframes which I shared with both the team then with users. I did roughly 6 rounds of wireframes where I was adding or subtracting features based on specific user feedback.
Design
The final step was the design. This was the easiest part as Jirav by that point had the beginnings of a style guide. So I used several screenshots which I overlayed my designs onto and eventually did a huge prototype which covered all the required use cases.
Project Elements
Wireframes – This is the first draft of wireframes I produced. It shows the basic concept and attempts to address all the initial requirements.
Final designs – The final designs covered the entire user journey from creating an assignment all the way to the recipient competing their tasks.
Prototype – This prototype was more for the developers to click around and get an idea of how the share feature functioned. It was meant to prompt a conversation if anything didn’t make sense.
Outcome
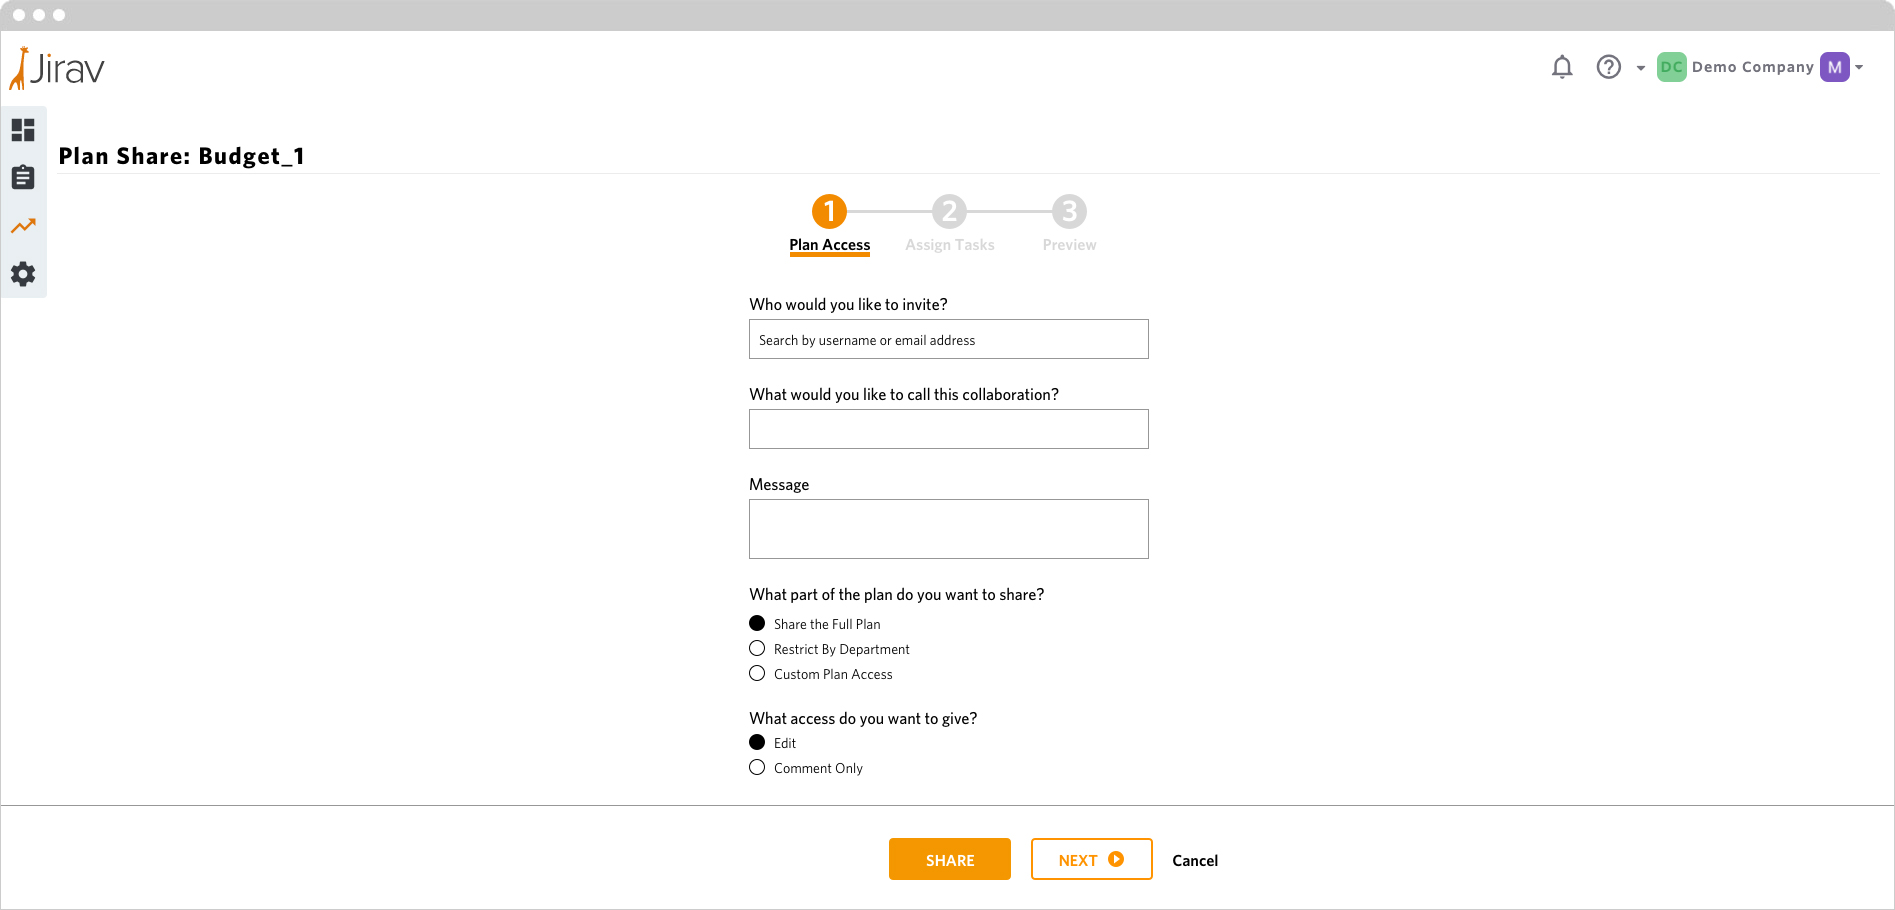
Share Plan
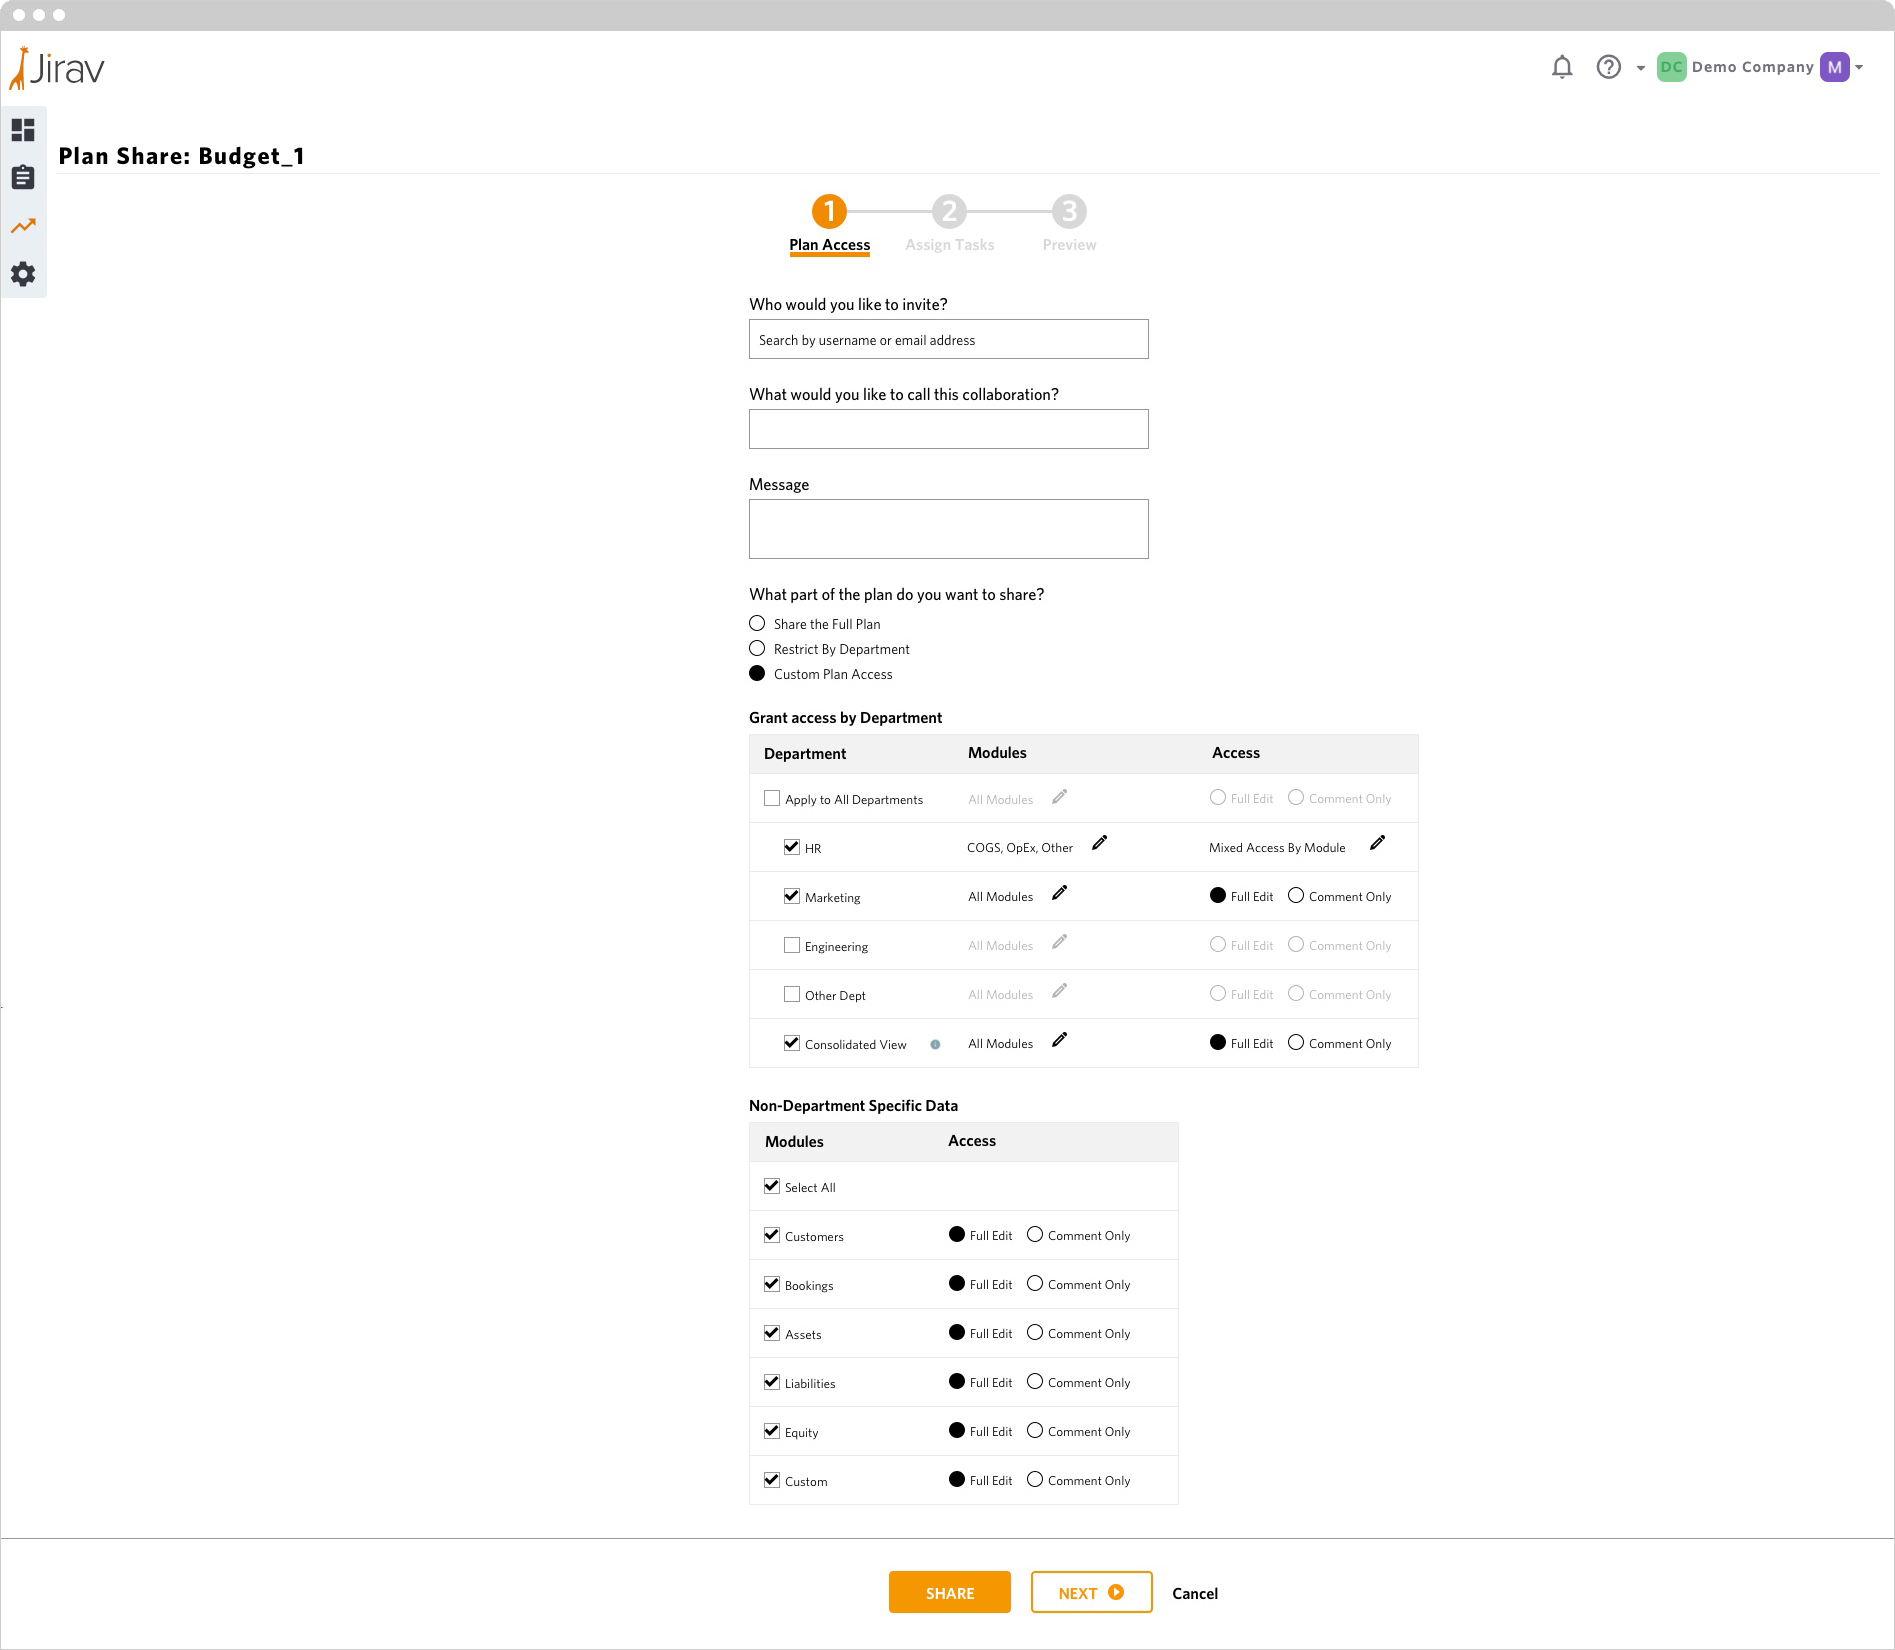
When a user wants to share a plan for collaboration they have the ability to choose who they want to share the plan with, which parts of the plan to share and what level of access each user has.
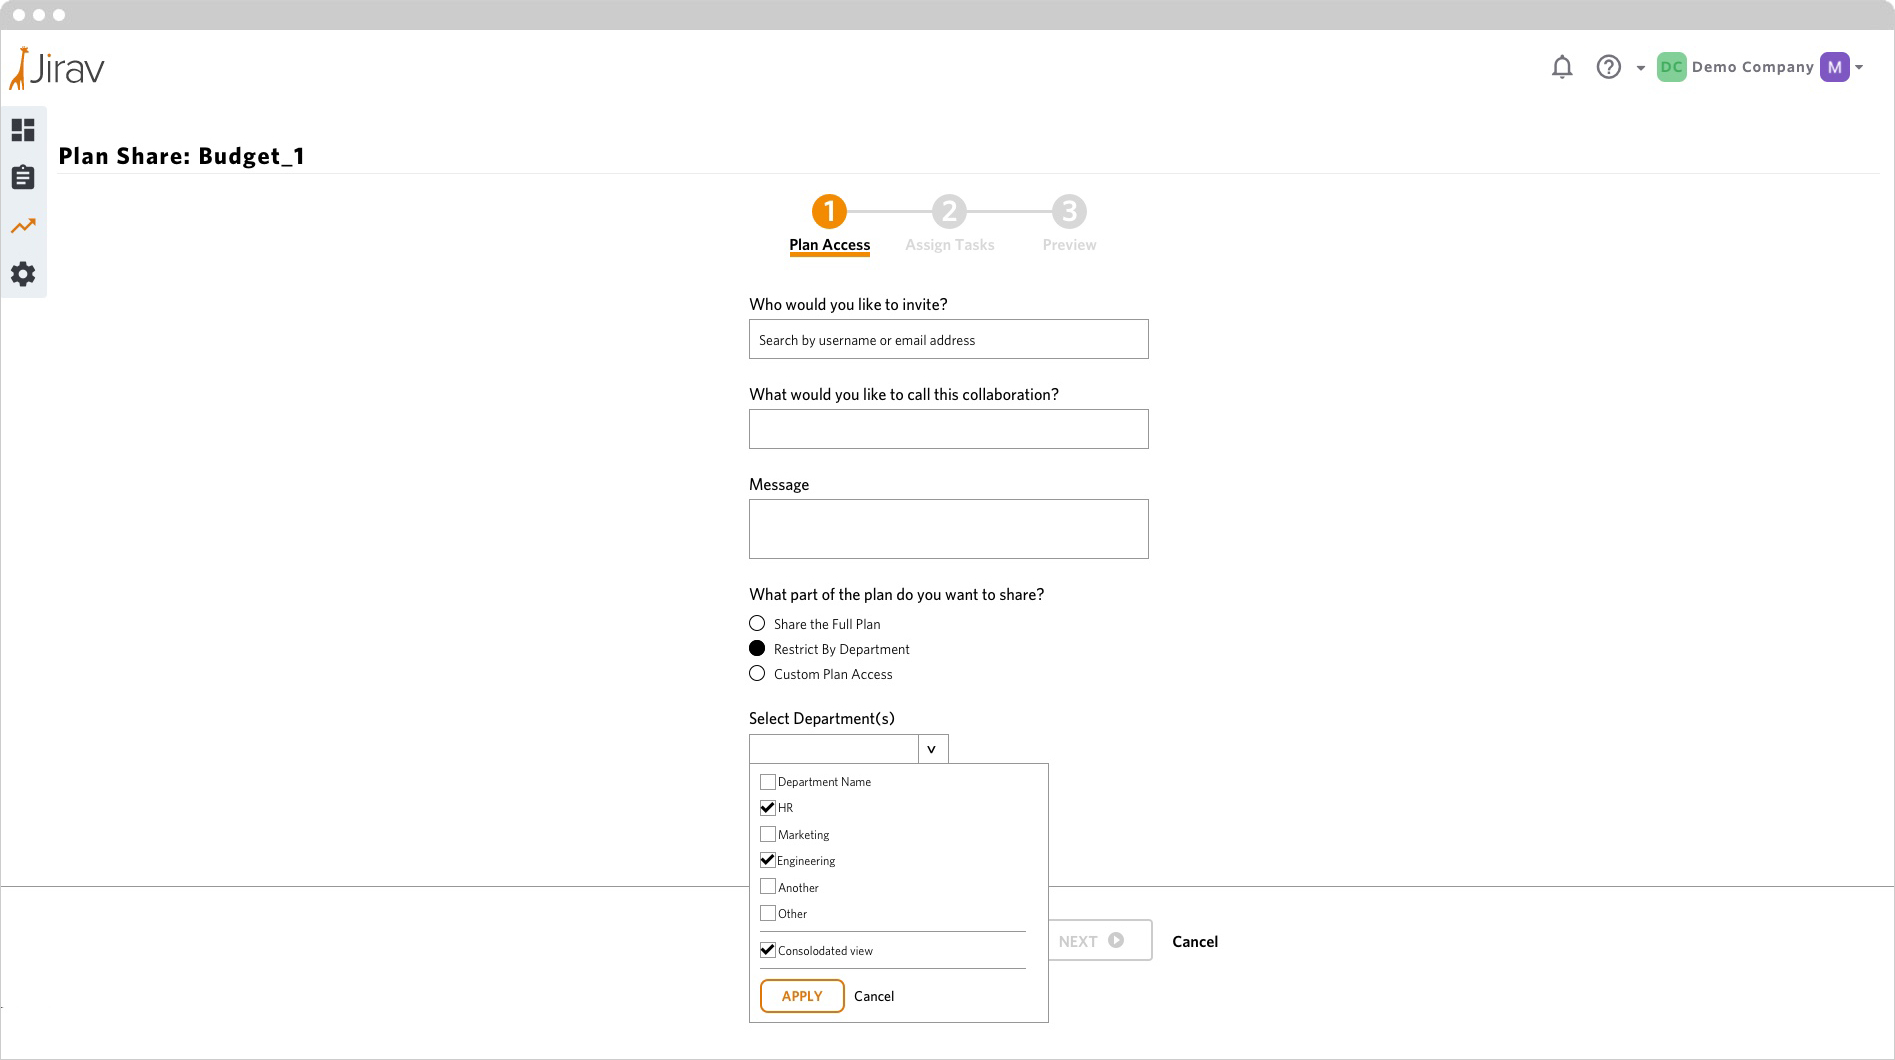
Share Plan: Restrict By Department
The “creator” has the ability to restrict user access by department.
Share Plan: Custom Plan Access
If the “creator” decides they want to select custom access they can control every aspect of the access each user has. They have the ability to select which department, module (subset of a department) or what additional data they data want to give or block access to. Even after the plan access has been set up they will be able to further edit access while creating specific tasks per individual.
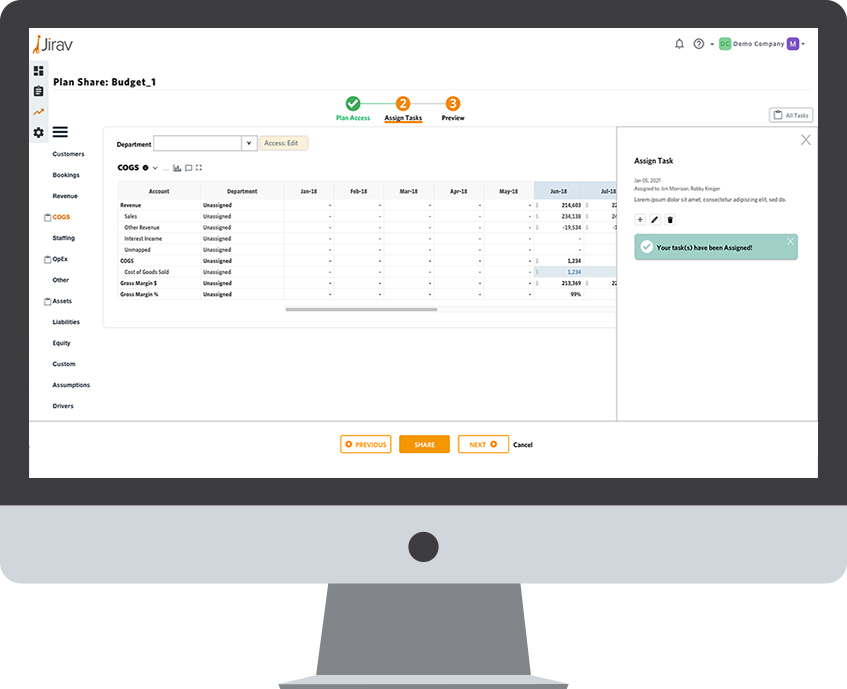
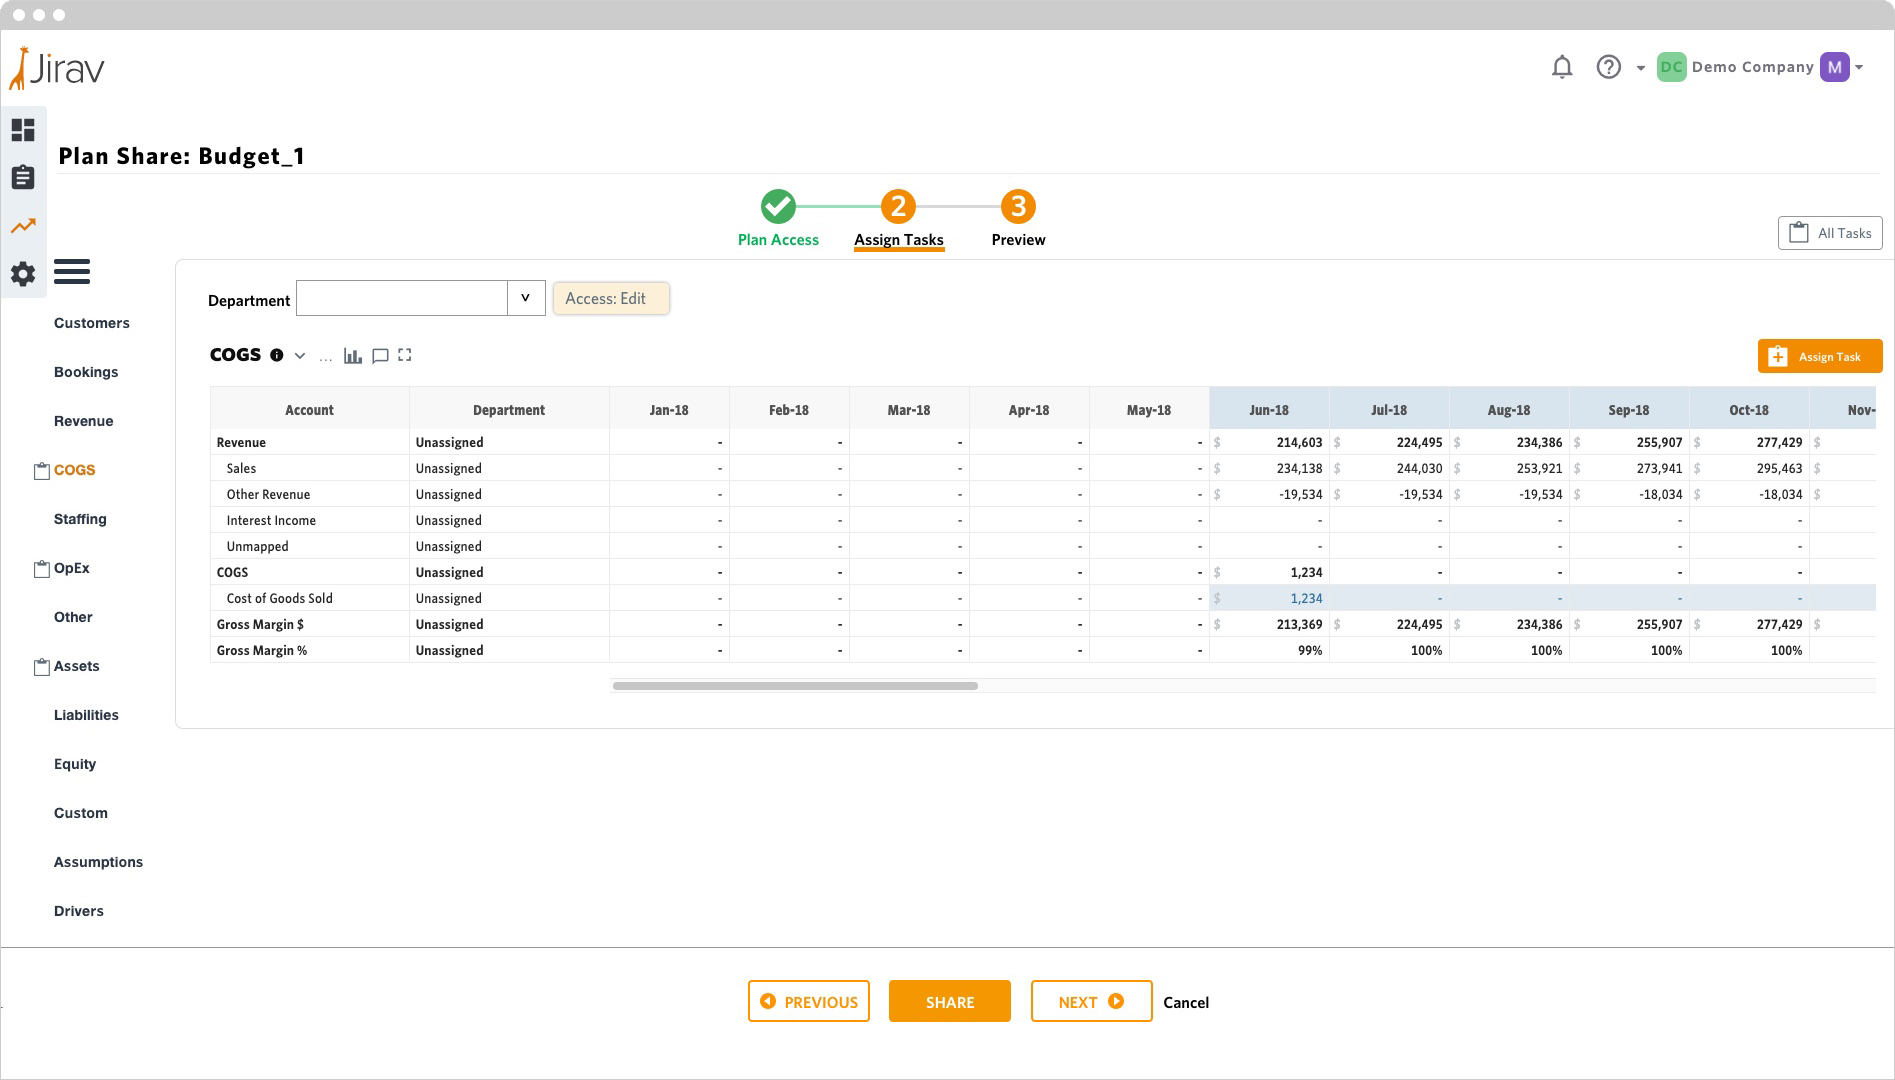
Assign Tasks
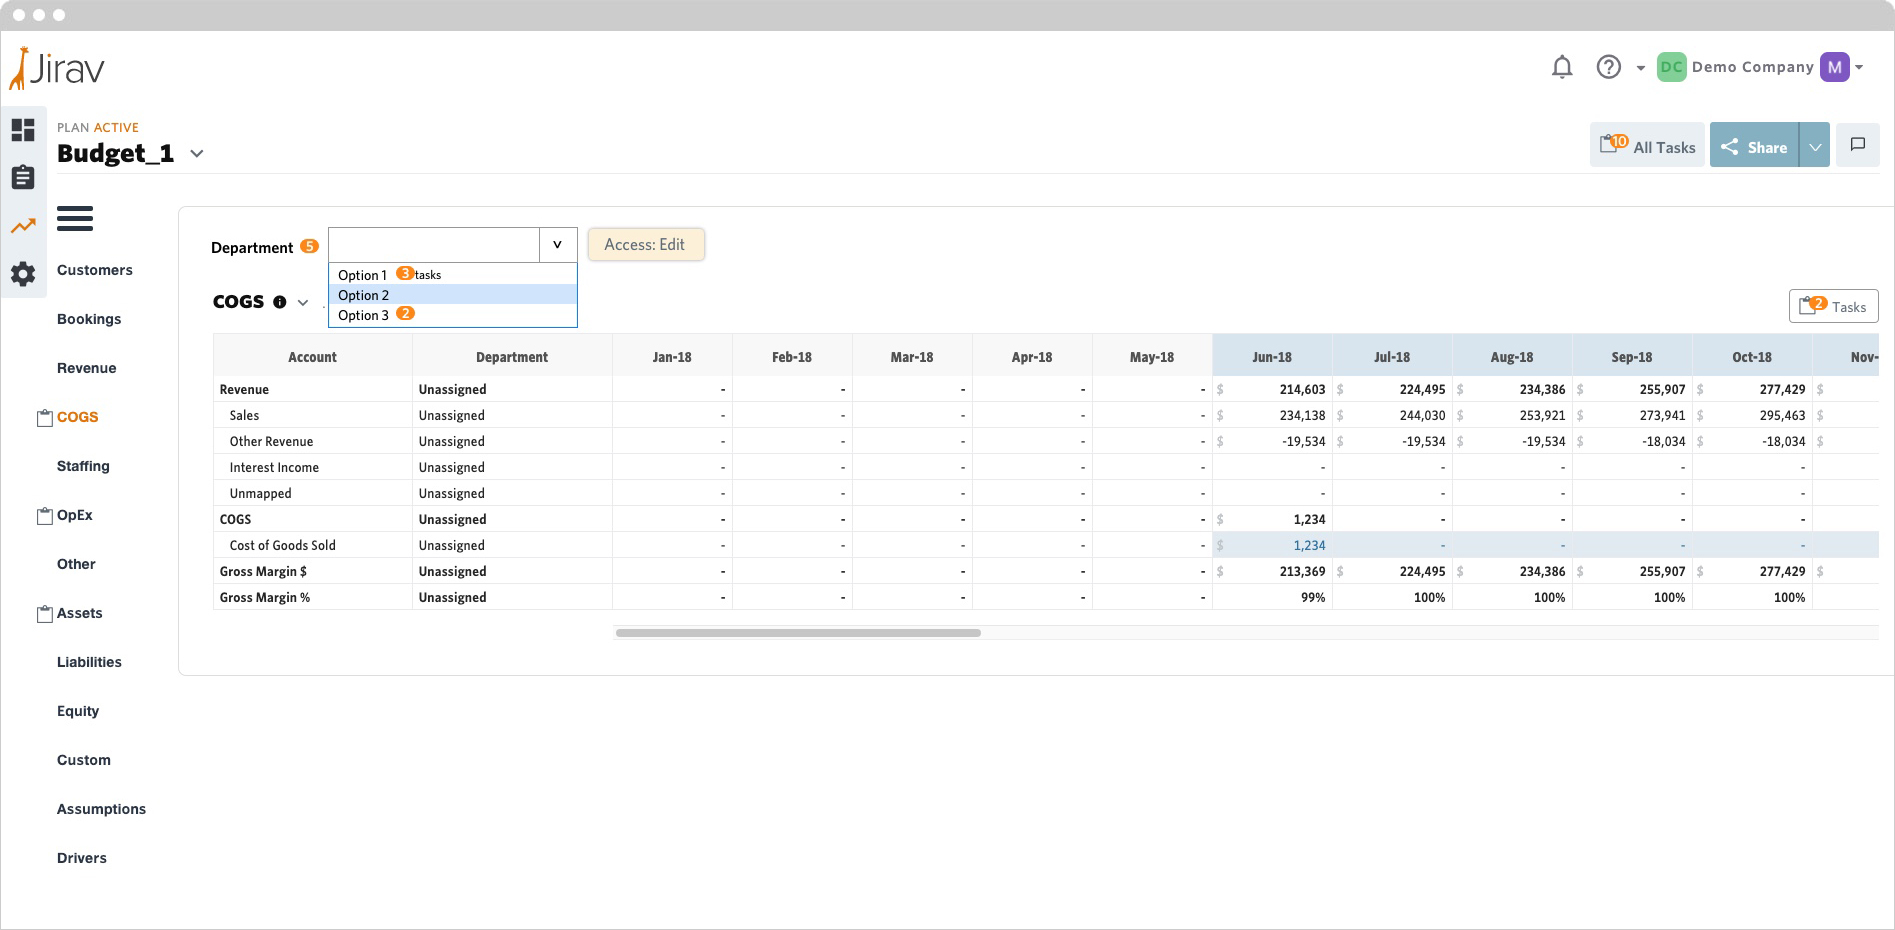
Once access has been determined the user will be brought to the “Assign Tasks” area. It is intentionally set up looking like the Jirav application. The user can navigate how they would normally in the application.
On the left navigation there are clipboard icons next to certain sections. This is to show the user where they have already assigned tasks. To the right of the department dropdown it shows the access level the assignee will have when they select different departments.
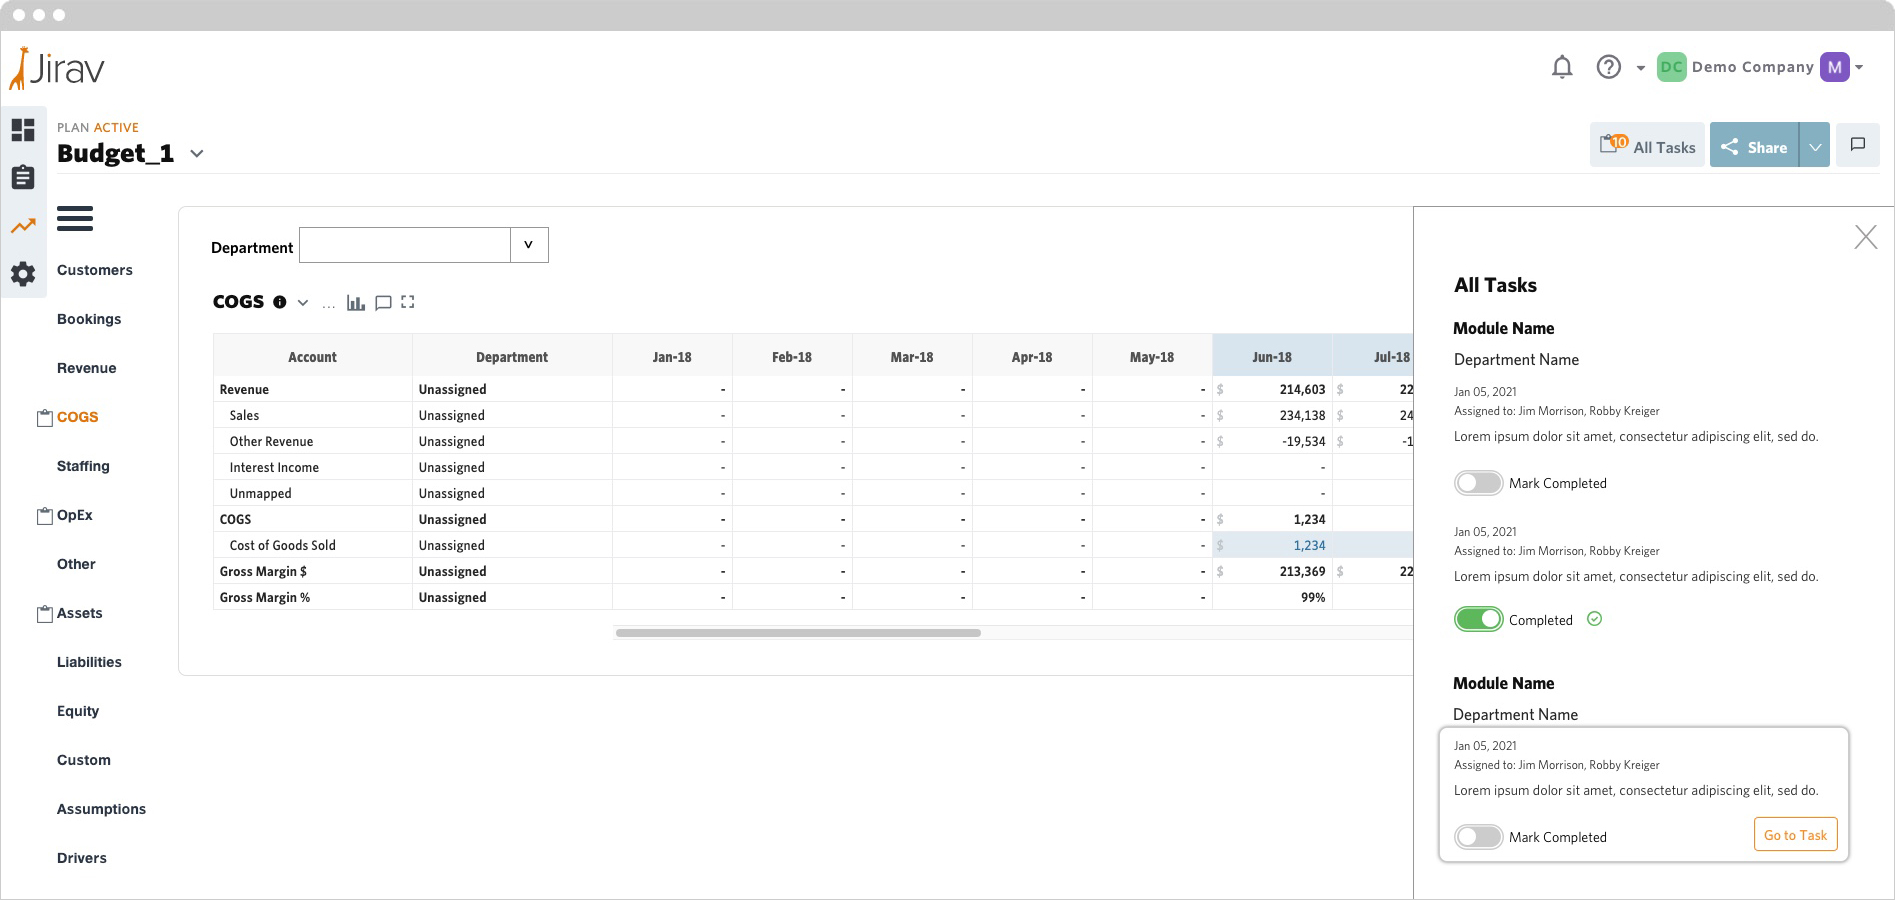
The “All Tasks” button on the right will display all tasks assigned to each assignee. Lastly, the “Assign Task” button is where the user will assign tasks to different assignees.
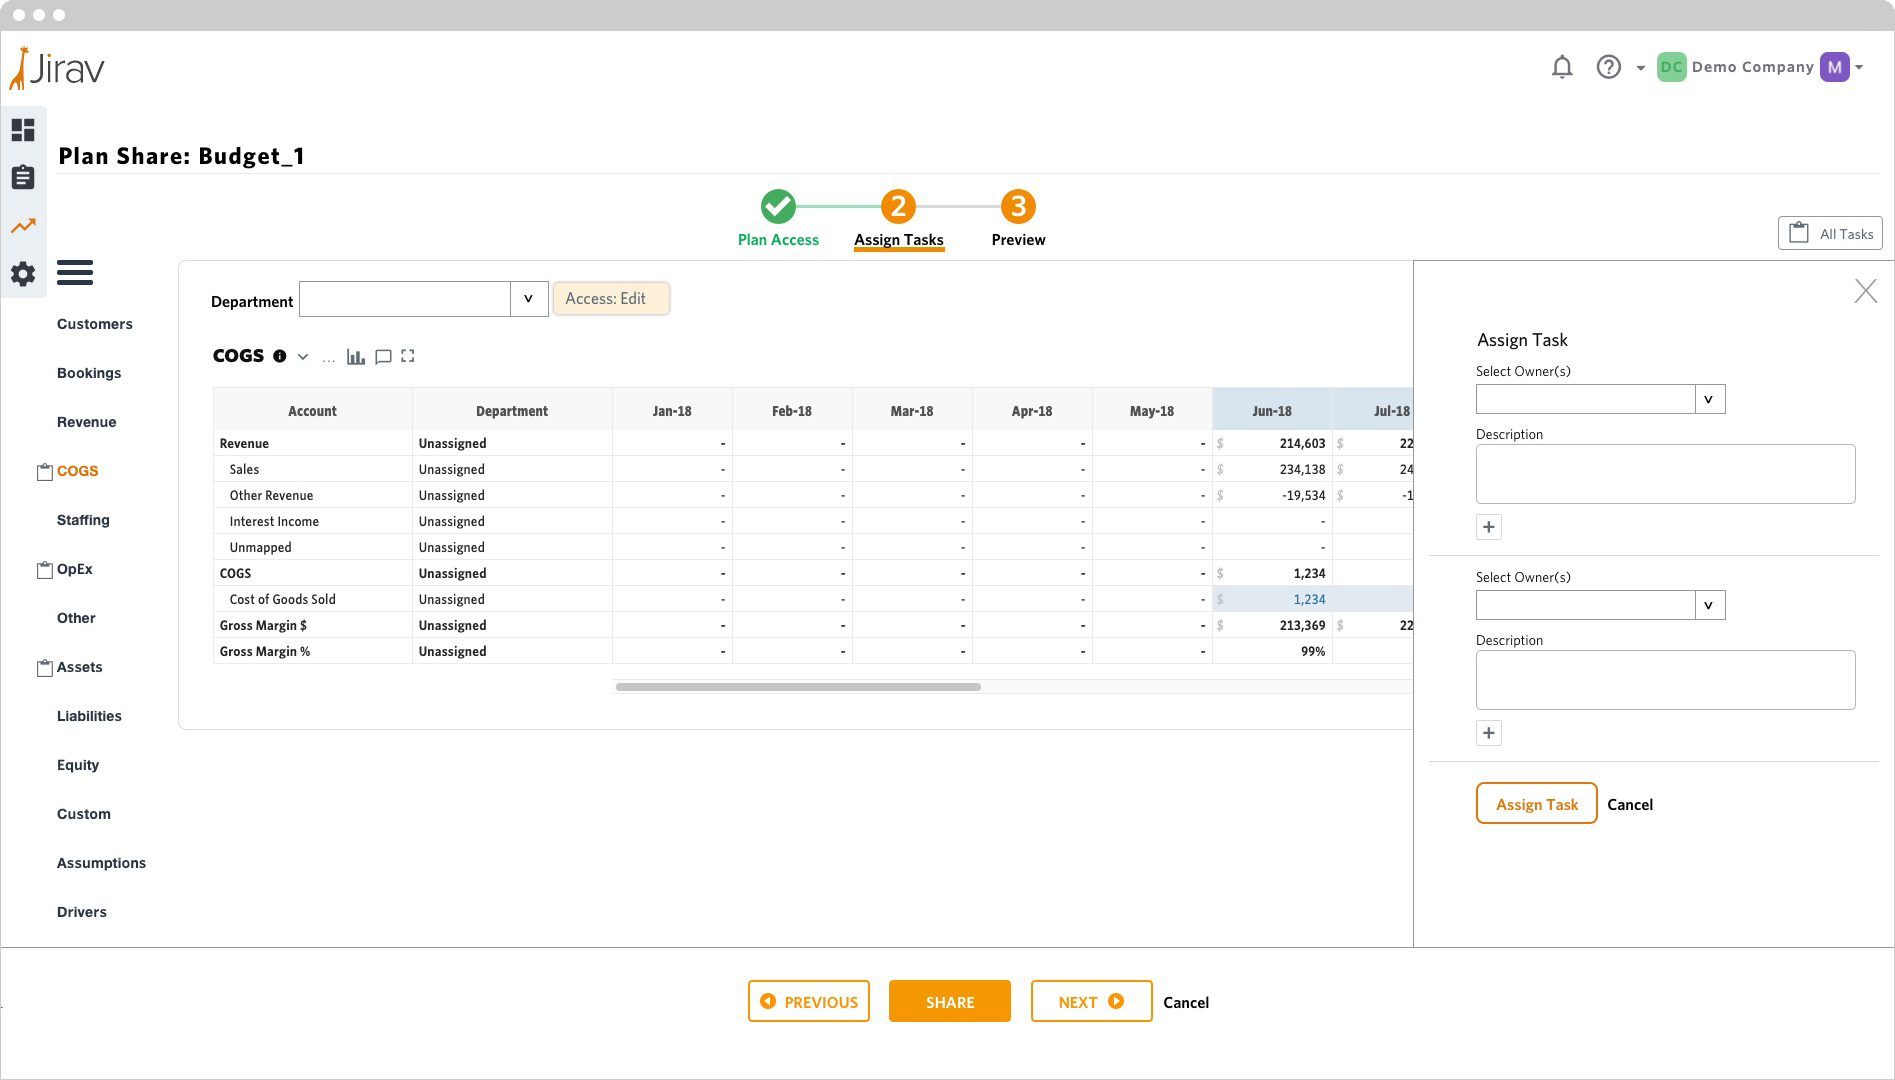
Assigning a Task
When the user clicks the “Assign Task” button a flyout menu will appear, this followed existing Jirav standards. From here the creator can select a participant and add a description. When assigning a task it will be automatically attached to the section, department or module the user is on when they create the assignment. This view shows if a creator wants to assign multiple tasks at a time.
On a personal note I wanted to add the flexibility of allowing the creator to add the section, department or module info when assigning a task but the product owner overruled me in that case. They felt the creator should be looking at the data they are assigning.
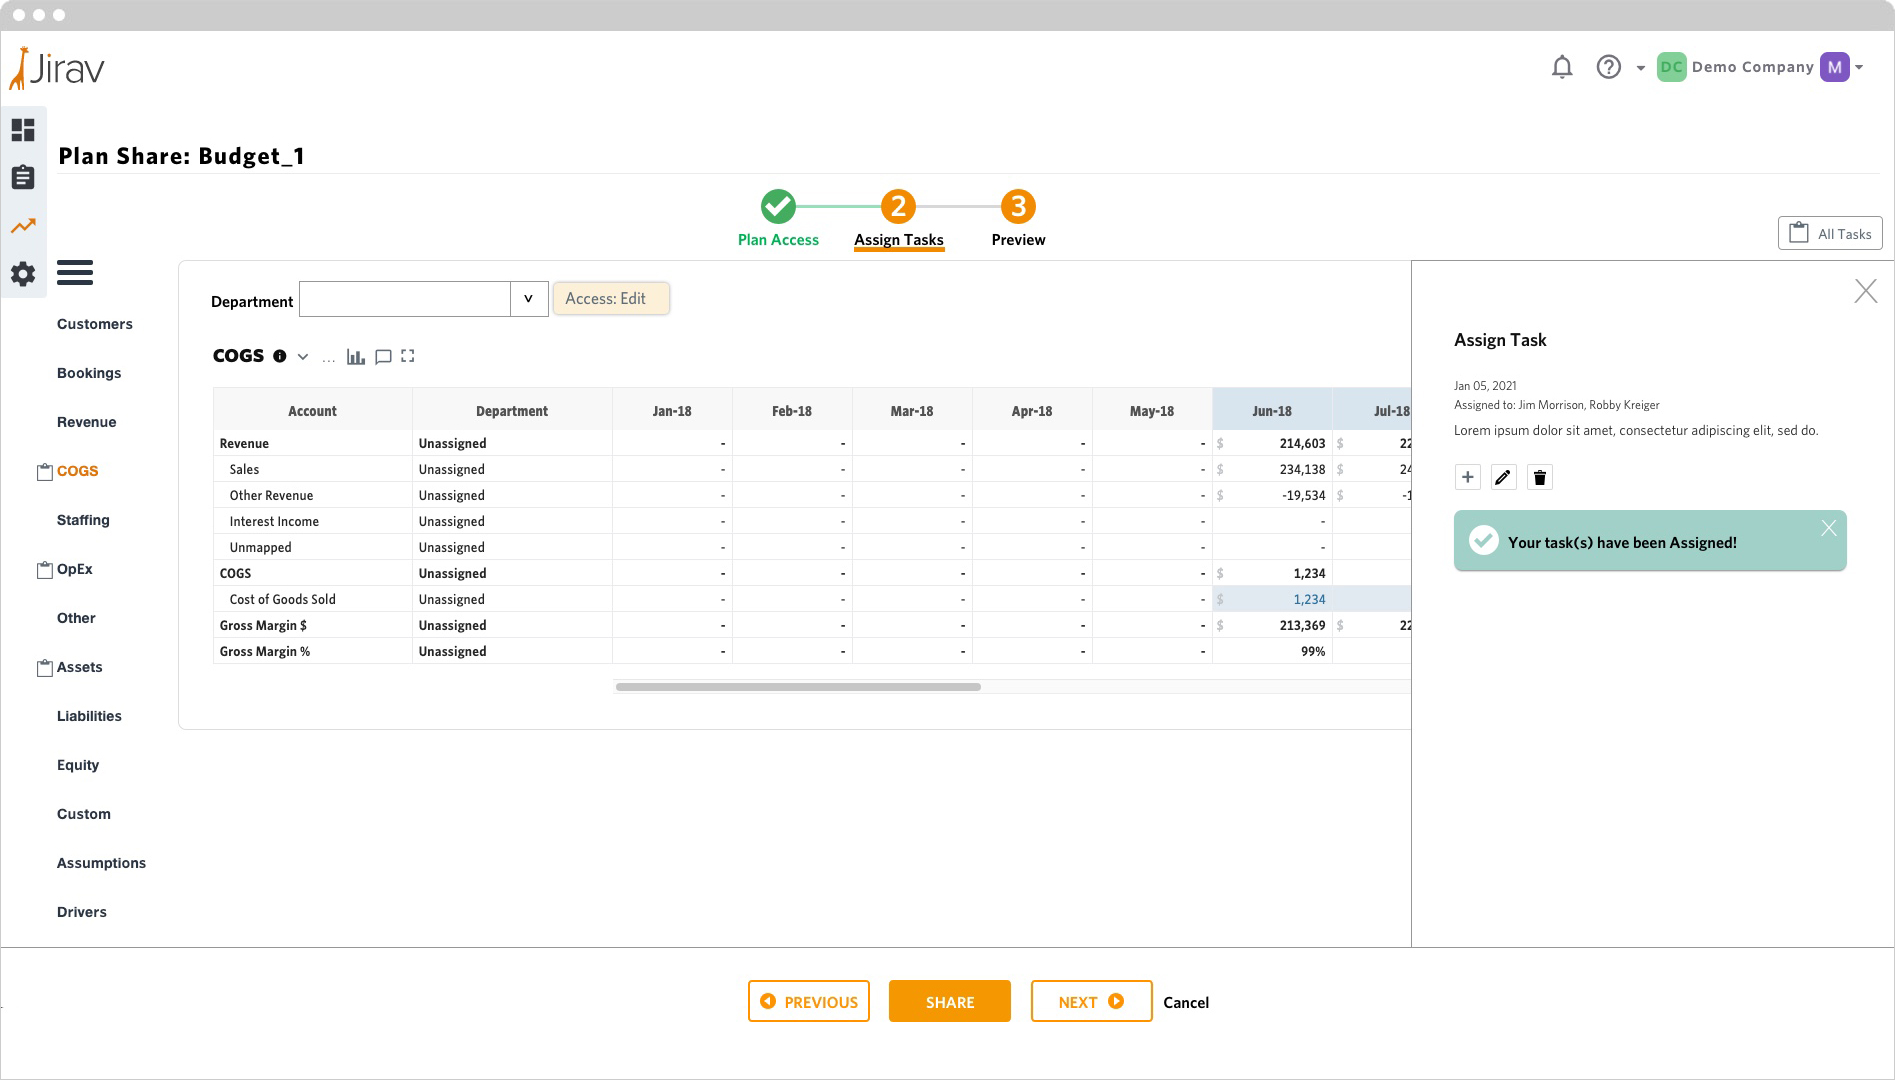
Task Assigned
Once a task has been assigned the user will see a notification the task has been saved. They have the option of deleting or editing the task. They also can add additional tasks as well.
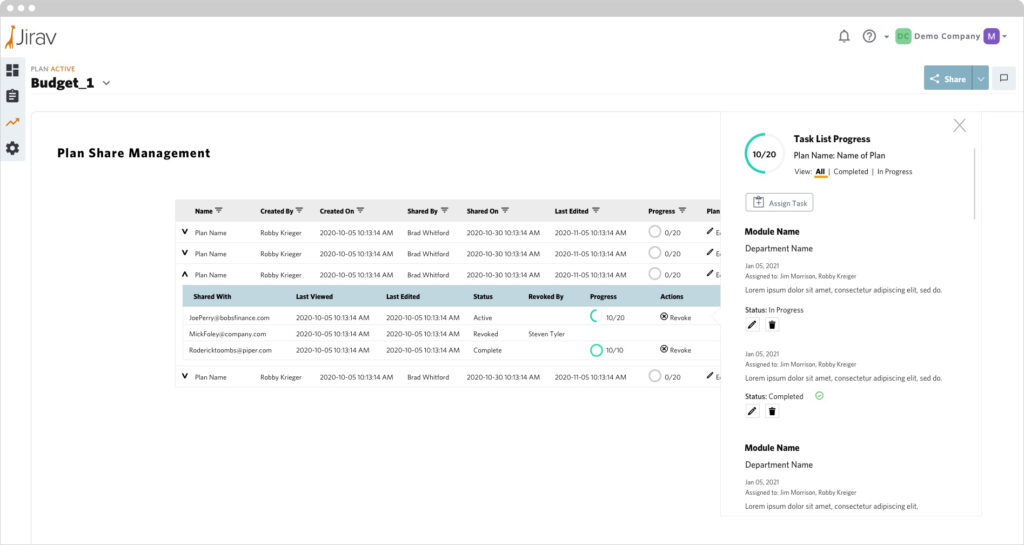
Plan Management
From this screen users can who created an assignment, when it was created and several other details. A user can also edit plan access, even revoke access to assignments. A user can also check in on the progress of different tasks by clicking on table rows.
Recipient
When the recipient receives their task assignments they will see how many total tasks they have in the “All Tasks” button is the upper right of the screen. They will also see which departments require their attention. Lastly, they will be able to see their individual tasks based on their current selected department (in this example the user is in Department: Option 3).
Recipient: All Tasks
The easiest way for a user to see and complete their task is if they click on the “All Tasks” button. Their tasks are organized by Module then department. A user can hover over a specific task and they will be able to navigate to the Module/Department their task is assigned to. Lastly, when a task is completed they are able to mark it as completed.